/en-fr/blogs/stories.atom Neptune - Stories 2025-08-11T15:14:02+01:00 Neptune /en-fr/blogs/stories/in-the-kitchen-with-emma-sims-hilditch 2025-03-05T08:46:46+00:00 2025-03-05T08:49:32+00:00 In the kitchen with Emma Sims-Hilditch Chloe Oakley Neptune’s creative founder relaxes by cooking healthy, vegetable-based recipes for friends and family.Here, Emma shares three of her favourite spring dishes for an informal supper party.

More

]]>
Neptune’s creative founder relaxes by cooking healthy, vegetable-based recipes for friends and family and often shares her ideas on her Instagram feed . Here, Emma shares three of her favourite spring dishes for an informal supper party.

Pea soup recipe


Split pea soup

When cooking plant-based dishes, it’s important to remember the protein content. Split peas or lentils are a great source of protein, and this soup not only looks beautiful and tastes delicious but is also great as a light lunch served with warm, crusty rye bread. Serves 4.

What you'll need

  • 90g shallots
  • 2 cloves of garlic
  • 100g carrot
  • 1 stick of celery (70g)
  • 7g ginger
  • 200g split peas
  • 1200ml water
  • 10g vegetable Boullion powder
  • ½ tsp turmeric
  • Olive oil
  • For the garnish
  • 25g each of pumpkin and sunflower seeds
  • 1 tbsp soy sauce

What to do

  1. Chop the shallots, carrots and celery to 5mm dice. Heat olive oil in a saucepan and add the diced vegetable mix, garlic and ginger. Fry gently, then turn it down to sweat, stirring occasionally. Add the turmeric and the split peas, stir, then add the stock and measured water. Cover with a lid and simmer gently for 45 minutes until the split peas are completely soft.
  2. Transfer the soup to a blender. Process until silky smooth, adding a little water if needed to achieve the texture of thick double cream. Pass through the sieve, season to taste and keep warm.
  3. Scatter the seed mix on a baking tray and roast for 10 minutes at 180°C in the oven. Remove, sprinkle with soy sauce and allow to cool.
  4. Pour the soup into 4 soup bowls. Garnish with roasted seeds and a drizzle of olive oil. Serve straight away.
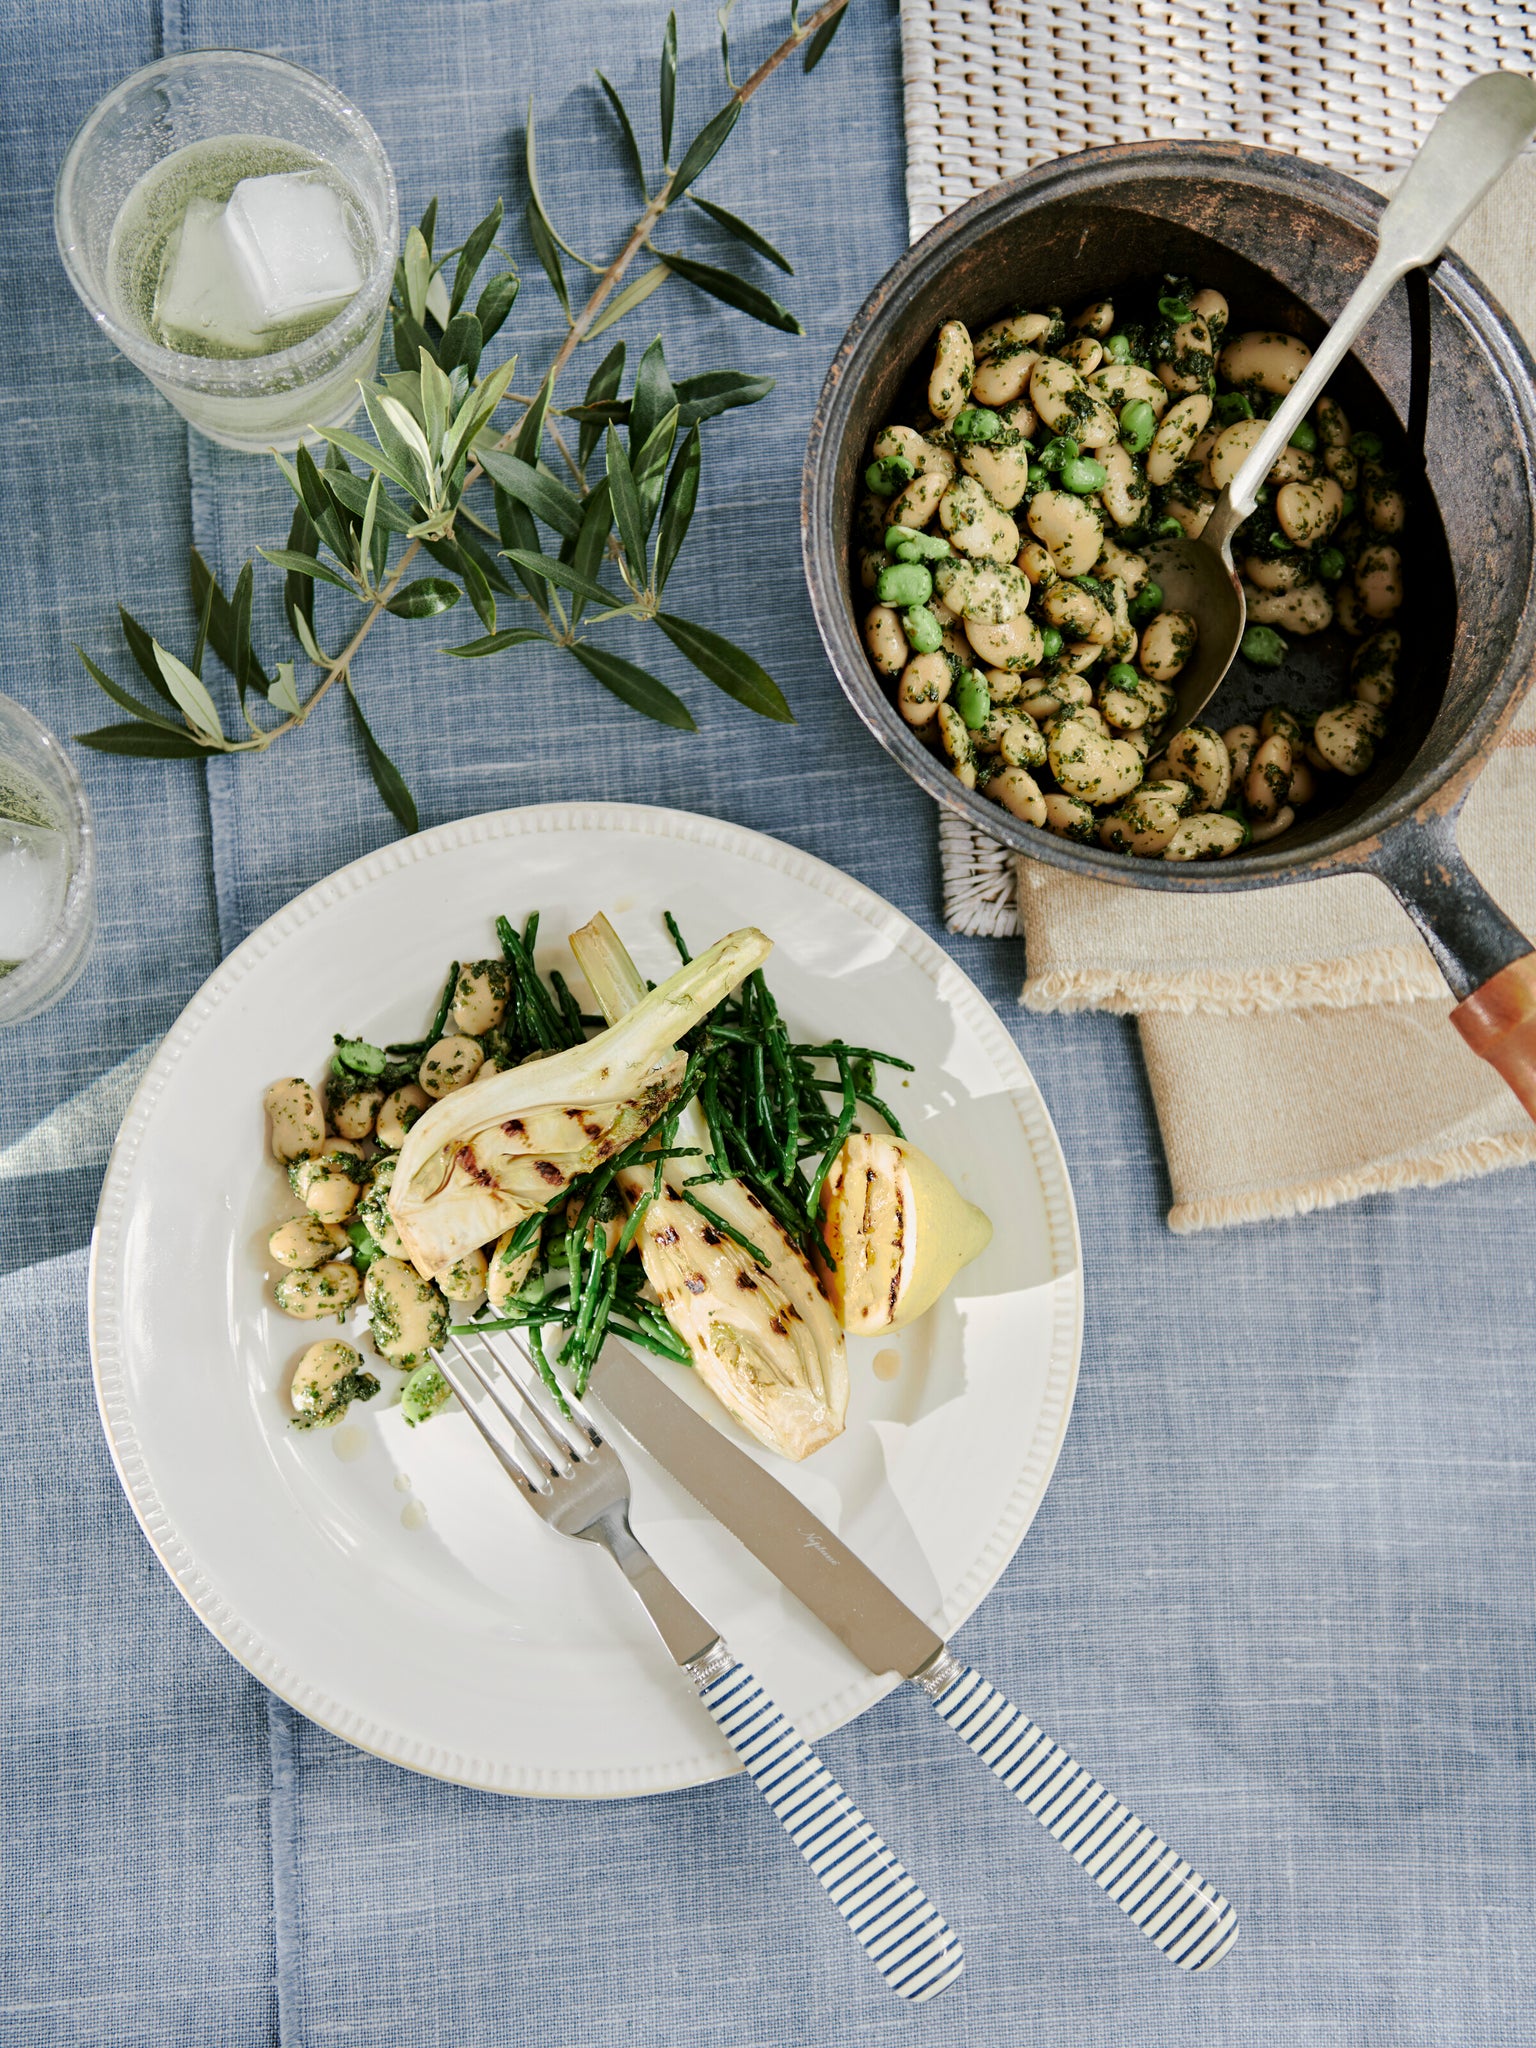
Roasted Beetroot supper

Roasted beetroot and butter bean supper

This dish is a family favourite as it is so tasty and reminds us of Italy, where sage is an important ingredient in many pasta dishes. We go big on sage at home, but if you don’t have any to hand, you can always substitute with parsley or other herbs. Serves 4.

What you'll need

  • 600g beetroot
  • 400g Chantenay carrots
  • 2 cans of organic butter beans
  • Bunch of fresh sage
  • 200g feta or goat’s cheese (optional)
  • Extra virgin olive oil
  • Garlic salt and pepper
  • Pinch of chilli flakes

What to do

  1. Slow roast the beetroot by wrapping each bulb tightly in foil and cooking in the oven for about 1 hour at (fan) 200°C. Check they are cooked by inserting a skewer into the beetroot to ensure it is soft. When cooked, roughly chop up and set aside.
  2. Drizzle the carrots with olive oil, garlic salt and pepper and, in the same oven, roast them whole for 25 minutes.
  3. Empty 2 cans of organic butter beans into a saucepan with the aqua fava juice from the tin and leave them to gently simmer for up to 10 mins. Season with garlic salt, pepper and a pinch of chilli flakes.
  4. Meanwhile roughly chop up a handful of fresh sage leaves and lightly fry with olive oil and a knob of butter until crisp. Add a sprinkle of garlic salt and pepper to taste. Toss the beans into the sage oil and butter and heat through.
  5. Dish the roasted beetroot, carrots, butter beans and sage onto a plate and, if you wish to, crumble over a block of feta cheese or goat’s cheese. Serve immediately.
Chocolate honey pot pudding

Chocolate honey pots with chocolate soil and rose sorbet

This little chocolate pudding really packs a punch and has the advantages of extra virgin olive oil and dark chocolate � both highly beneficial ingredients on the Blood Type Diet, which we follow at home. The delicate rose sorbet is a lovely palette cleanser and balances the chocolate perfectly.

What you'll need

For the chocolate pots:

  • 300g dark chocolate, 53-55% cocoa solids, coarsely grated
  • 110ml extra virgin oil
  • 2 pinches of sea salt
  • 360ml boiling water
  • 40g honey

For the sorbet:

  • 245g caster sugar
  • 15g dried rose petals
  • 545g water
  • 1 tbsp glycerine
  • Juice of 1 lemon (30ml)

For the chocolate soil:

  • 100g caster sugar
  • 2 tbsp water
  • 75g dark chocolate, 53-55% cocoa solids, coarsely grated

What to do

  1. Melt the chocolate over a bain-marie. In a heatproof mixing bowl, combine the chocolate with the boiling water and add the honey, olive oil and salt. Gently whisk the mixture until it is silky smooth and cool to the touch. Pour the mix into 4 to 8 pots and put in the fridge for 4 hours to set.

To make the rose sorbet

  1. Bring the sugar and water to the boil and simmer for 10 minutes, add the rose petals and simmer for a further 5 minutes, then add the lemon juice and glycerine. Stir through. Remove from the heat and leave to sit for 30 minutes. Drain the liquid and give the petals a squeeze.
  2. Pour into a container and place in the freezer uncovered. Leave for a couple of hours until the edges start to freeze. Stir the mixture and allow to freeze again, repeat until frozen. Blend the sorbet to give a smoother consistency then return to the freezer until ready to serve.

To make the chocolate soil

  1. Heat sugar and water to around 137° then remove from the heat and quickly stir in the broken-up chocolate, keep mixing until the soil is a crumbly consistency.
  2. Sprinkle a little chocolate soil onto each chocolate pot and top with a scoop of sorbet. Serve straight away.
]]>
/en-fr/blogs/stories/in-the-kitchen-with-hugo-guest-seville-orange-marmalade 2024-09-05T08:36:16+01:00 2024-09-25T12:10:27+01:00 In the kitchen with Hugo Guest: Seville orange marmalade Chloe Oakley A cherished family recipe which produces about five kilos of marmalade, perfect for gifting to friends and family as a delicious sweet treat.

More

]]>
This recipe will make about five kilos of marmalade

As the chef and proprietor of in Devon (together with wife Olive), Hugo Guest brings an artisanal approach to his cooking.This is a recipe that was handed down Hugo by his dad, who takes on the annual task of making gallons of marmalade at the start of the year when Seville oranges are briefly in season. This method avoids the hassle of squeezing orange juice and scraping out pith and pips. Preparing the fruit overnight softens it, making it easier to cut and, ultimately, saving time. Hugo and his family also make limoncello around the same time, and adding a few tablespoons to the marmalade elevates this classic recipe.

What you'll need

  • 1.5kg Seville oranges
  • Juice of 2 lemons
  • 2l water
  • 2.25kg sugar
  • 8 tbsp limoncello

What to do

The night before
  1. Place the oranges and lemon juice in a large pot and cover with two litres of water. If the water doesn’t cover the oranges, use a smaller pot. Weigh the oranges down with a plate to keep them submerged if necessary.
  2. Bring the pot to a boil, cover, and then reduce the heat to a gentle simmer.
  3. Simmer on low for about two hours, or until the fruit is soft, then turn off the heat and let the mixture sit, covered, overnight.

The next morning
  1. Remove the lid and lift the fruit into a colander, leaving the orange liquid in the pot.
  2. Cut the oranges in half and scoop out all the pips and pith, adding them to the pot with the liquid. Set the peel aside for now.
  3. Boil the juice, pips and pith for six minutes with the lid off .
  4. Strain the juice through a sieve, pressing the pulp through with a wooden spoon. This thick liquid is high in pectin and helps set the marmalade. Pour half of it into your largest cooking pot or preserving pan.
  5. Cut the orange peel as thinly as desired and add half to the liquid.
  6. Add half the sugar and stir over a medium heat until the sugar has dissolved.
  7. Bring the pot to a rapid boil for fifteen-twenty minutes until the setting point is reached.
  8. Stir in four tablespoons of limoncello and let the mixture sit for ten minutes to cool slightly, then pot, seal and label.
  9. Repeat the process for the remaining batch.
]]>
/en-fr/blogs/stories/pistachio-and-olive-oil-cake 2024-09-05T08:33:40+01:00 2024-09-05T08:33:40+01:00 In the kitchen with Hugo Guest: Pistachio and olive oil cake Chloe Oakley The combination of textures and flavours make for a delicious cake for special occasions. Recommended served sliced, along with a cup of tea.

More

]]>
Hugo Guest, chef and owner of award-winning guest house and restaurant, shares his favourite cake recipe perfect for an afternoon teas with a difference.Originally inspired by Anna Higham’s olive oil and ricotta cake from her extraordinary cookbook, , it is definitely a grown-up cake. The natural oils from the pistachios coupled with good quality, fruity, extra virgin olive oil and the crunch from the stone-ground polenta makes for a special eating experience. Serve sliced, along with a cup of tea. If you’re struggling to find nice pistachios, ground almonds will be a good substitute.

What you'll need

  • 275ml extra virgin olive oil
  • 4 eggs
  • 250g caster sugar
  • 150g Greek yoghurt
  • 200g ground pistachios
  • 100g stone-ground polenta
  • 2 tsp baking powder
  • 1 tsp salt Butter or flavourless oil, for greasing
  • 2 tbsp demerara sugar

What to do

  1. Preheat your oven to 170°C (150°C for fan ovens). In a large mixing bowl, combine the olive oil and eggs, whisking until they’re thoroughly mixed.
  2. In a separate bowl, beat the sugar and yoghurt together until the mixture is smooth, then add this to the egg and oil blend. Gradually incorporate the dry ingredients, excluding the demerara sugar, and mix until everything is evenly combined.
  3. Make as one large single-layer cake in a twenty-five centimetre springform tin. Be sure to grease the tin well and line the base with baking parchment. Pour in the batter, then sprinkle the top with the demerara sugar. Bake for fifty minutes to one hour.
]]>
/en-fr/blogs/stories/in-the-kitchen-with-hugo-guest-courgette-ricotta-and-anchovy-tart 2024-09-05T08:30:37+01:00 2024-09-05T08:31:23+01:00 In the kitchen with Hugo Guest: Courgette, ricotta and anchovy tart Chloe Oakley Hugo Guest, chef and owner of award-winning guest house and restaurant, loves this hugely adaptable recipe for lunches or family dinners.

More

]]>
Hugo Guest, chef and owner of award-winning guest house and restaurant , loves this hugely adaptable recipe for lunches or family dinners. Hugo like's to make this tart in the style of a galette and finds that ricotta forms a great base and is a blank canvas for any seasonal vegetables. For this recipe Hugo chose courgette, ricotta and anchovies, but he’s also made the same tart with thinly sliced tomatoes, sliced squash or wilted chard. You can make it in advance and heat it through in the oven before serving.

For the filling

What you'll need:

  • 160g ricotta
  • 1 egg, lightly beaten, reserve half for egg wash
  • 30g Parmesan, grated
  • A good pinch of flaky sea salt
  • 1 lemon, zested, plus 1�2 tsp of the juice
  • 1 garlic clove, grated
  • A generous pinch of freshly chopped thyme
  • 5 anchovies, finely chopped
  • Black pepper, to taste

For the courgettes

What you'll need:

  • 400g of mixed heritage courgettes (different shapes and colours make for a more interesting finish)
  • A generous pinch of flaky sea salt
  • A splash of olive oil

For the tart base

What you'll need:

  • 250g flaky pastry (see recipe below) or ready-made puff pastry

What to do

  1. In a bowl, combine the ricotta with half of the egg. Stir in the Parmesan, sea salt, lemon zest and juice, garlic, thyme and anchovies, and season with black pepper.
  1. Thinly slice the courgettes (into approximately half-centimetre rounds). Toss these with the salt and place them in a colander to drain for thirty minutes. After draining, gently press out excess moisture and toss the rounds with olive oil.
  1. Set your oven to 220°C (200°C for fan ovens) and let it preheat.
  1. Roll the dough into a rectangle or circular (depending on preference), aiming for the thickness of a £1 coin. On the dough, spread the ricotta mixture evenly, stopping about 3.5cm from the edge. Layer the courgettes on top then drizzle with a bit of olive oil. Fold the edges of the dough over the filling to create a crust and brush the folded edge with the remaining egg.
  1. Lower the oven temperature to 200°C (180°C for fan ovens). Place the tart in the oven and bake for forty–fifty minutes until it turns golden brown. Ensure the base is completely cooked by lifting it slightly to check. If the top browns too quickly, cover it with foil.
  1. 6. Allow the galette to cool slightly, then serve with some nice seasonal leaves and fresh herbs. To reheat, place the galette in a preheated oven at 180°C (160°C for fan ovens) for about ten–fifteen

Flaky pastry recipe

What you'll need:

  • 320g strong white flour
  • 250g unsalted butter (cold, cut into small cubes)
  • 80ml ice-cold water
  • 6g salt

What to do:

  1. Place the flour, butter, and water individually in the freezer for about ten–fifteen minutes to get them very cold.
  2. That done, mix the flour and salt together in a large bowl. Add the cold butter cubes and, using your hands, squash them into the flour until the mixture resembles coarse crumbs � you still want to be able to see chunks of butter through the mix.
  3. Gradually add the ice-cold water, mixing gently with a fork until the dough starts to come together. Don’t overwork the dough to keep it flaky.
  4. Gather the dough into a ball and roll it into a forty-centimetre-long rectangle (or as close as you can get to a rectangle). Perform a double fold by folding both edges into the middle and then folding it over itself again. Rest the dough for thirty minutes in the fridge and repeat the process. The pastry will keep well-wrapped in the fridge for up to a week.
]]>
/en-fr/blogs/stories/rhubarb-strawberry-trifle 2024-03-13T08:39:51+00:00 2024-08-28T10:29:37+01:00 In the kitchen with Hugo Guest: A Special Spring Lunch Chloe Oakley After working as a chef in London and Italy, Hugo Guest and his wife, Olive, returned to , ܲ’s family home in Devon, in 2020 to run it as a restaurant and guest house. They built a vegetable garden, an on-site bakery, and a temperature-controlled ageing room for salumi production to support their artisanal approach to cooking. Here, Hugo shares his favourite recipes for a special spring lunch.

Spring salad

Makes enough for four

The combination of early broad beans, radishes, asparagus, wild garlic and a heady mix of mustard salad leaves showcases the best ingredients spring has to offer. The addition of fresh curd cheese brings a little decadence and is a nice contrast to the rest of the dish.

What you’ll need

  • 150g broad beans, shelled
  • A bunch (about 200g) of asparagus, trimmed and cut into bite-sized pieces
  • 100g radishes, thinly sliced
  • 100g mixed mustard salad leaves
  • 150g fresh Jersey curds (you could also use sheep or goat’s curd)

For the wild garlic dressing/pesto:

  • 50g wild garlic leaves, washed and roughly chopped
  • 30g pine nuts
  • 30g grated Parmesan cheese
  • ½ lemon, juiced
  • 120ml extra-virgin olive oil
  • Salt and pepper, to taste

What to do

  1. Bring a pot of salted water to a boil. Add the shelled broad beans and asparagus and cook for a minute and a half. Drain and rinse with cold water to stop the cooking process. Set aside.

  2. In a large salad bowl, combine the sliced radishes, asparagus pieces, broad beans and mustard salad leaves.

  3. To make the wild garlic dressing, add the wild garlic leaves, pine nuts, grated Parmesan cheese and lemon juice to a food processor. Pulse a few times to roughly chop the ingredients, then, with the food processor running, slowly drizzle in the olive oil until you reach a smooth and creamy consistency. Season with salt and pepper to taste.

  4. Drizzle as much or as little of the wild garlic dressing as you’d like (leaving a little for topping at the end) over the salad, and toss again to evenly coat the ingredients.

  5. Divide the salad among four plates, then top each one with a generous sprinkle of fresh Jersey curds, and a few extra spoonfuls of the wild garlic pesto dressing. Serve immediately.

Baked pollock with braised lentils, spring greens & aioli

Makes enough for four

Pollock is a sustainable but equally delicious alternative to cod or haddock, and lends itself perfectly to this recipe. The lentils act as a blank canvas for lots of yummy things to be cooked through them: a base soffritto of onion, celery and carrot remains constant, however the spring greens can be replaced by any other seasonal vegetable. A punchy aioli ties this dish together nicely.

What you’ll need

  • 240g green or puy lentils
  • 700ml water
  • A bouquet garni of thyme and 2 bay leaves
  • 3�4 whole garlic cloves
  • 1 onion, finely chopped
  • 2 carrots, peeled and diced
  • 2 celery stalks, diced
  • 400g spring greens, shredded
  • 1 lemon, zested
  • 4 pollock fillets
  • 1 tbsp olive oil
  • A handful of chopped fresh parsley
  • A handful of chopped fresh dill
  • Sea salt

For the aioli:

  • 3 egg yolks
  • 2 large garlic cloves, finely grated or minced
  • 30g Dijon mustard
  • A pinch of sea salt, plus extra to taste
  • 450ml light olive oil
  • Lemon juice, to taste

What to do

  1. Preheat the oven to 160°C.

  2. To make the aioli, blitz together the egg yolks, finely grated garlic, Dijon mustard and a good pinch of sea salt in a food processor. While the motor is running slowly, drizzle in the olive oil in one continuous stream to create a stiff emulsion. When the mixture thickens, finish with lemon juice and additional salt if needed.

  3. To a saucepan, add the lentils, water, bouquet garni and whole garlic cloves, along with the chopped onion, carrots and celery. Season well with salt (you want the water to flavour the lentils as they cook). Bring the mixture to a gentle simmer, then reduce the heat to low. Cover the pan and allow the lentils to cook for about fifteen–twenty minutes, or until they’re partially done.

  4. Remove the bouquet garni and garlic cloves. Stir in the shredded spring greens and lemon zest. Continue to cook for a few more minutes until the spring greens have wilted, then transfer the lentils and greens to a suitable baking dish.

  5. Drizzle the pollock fillets with olive oil and season with a good pinch of flaky sea salt, then place them on top of the lentils and greens.

  6. Roast for approximately twelve minutes, or until the pollock is just cooked through (you can tell if it’s done when the skin peels off with ease). Allow the fish to rest for a few minutes.

  7. To serve, spoon a generous portion of the lentils and greens onto each plate and top with a roasted pollock fillet. Finish with a dollop of aioli and a generous scattering of chopped parsley and dill.

Rhubarb & strawberry trifle

Makes enough for ten

This pudding holds a special place in our hearts as it was one of our first puddings at Glebe House when we opened. It combines tangy rhubarb jelly, a layer of booze-soaked sponge, creamy custard and fluffy whipped cream. You can swap in shop-bought savoiardi biscuits (otherwise known as lady’s fingers) to save time.

What you’ll need

For the rhubarb jelly:

  • 500g fresh rhubarb, trimmed and chopped
  • 95g caster sugar
  • 250ml water
  • 1 orange, rind and juice
  • 80g strawberries, hulled and thickly sliced
  • 2.5 bronze gelatine leaves
  • Extra orange juice, to top up if needed

For the savoiardi biscuits:

  • 3 large eggs, separated
  • 100g caster sugar
  • 1 tsp vanilla extract
  • 90g plain flour
  • Icing sugar, for dusting
  • Vinsanto or a French dessert wine like Sauternes

For the custard:

  • 450ml double cream
  • 1 vanilla pod
  • 2 eggs
  • 2 egg yolks
  • 85g caster sugar

To top the trifle:

  • Whipped cream (450ml cream, 1 tsp vanilla extract, 60g icing sugar)
  • Toasted flaked almonds
  • Fresh strawberries, diced

What to do

To make the juice for the jelly (start a day before):

  1. Add the chopped rhubarb to a lidded casserole pot with the sugar, water, orange rind and juice and mix well. Cover and leave overnight at room temperature to allow the juices from the rhubarb to seep out.
  2. The following day, preheat the oven to 140°C. Place the casserole dish (with its lid) in the oven and bake for around forty minutes, or until the rhubarb has softened.
  3. Once cooked, remove from the oven, then add the thickly sliced strawberries to the rhubarb. Put the lid back on and leave everything to cool.
  4. Strain the juice through a fine sieve and put to one side. Make sure you reserve the stewed rhubarb and strawberries as these will be added to the jelly for texture.

To make the savoiardi biscuits:

  1. Preheat the oven to 175°C. Line a baking sheet with parchment paper.

  2. Beat the egg yolks, sugar and vanilla extract together until creamy and pale yellow. In a separate bowl, beat the egg whites until stiff peaks form.

  3. Gently fold the egg whites into the egg yolk mixture. Sift the flour over and fold until well combined.

  4. Transfer the batter to a piping bag fitted with a large round tip. Pipe long, finger-shaped biscuits onto the baking sheet. Dust with icing sugar.

  5. Bake for twelve to fifteen minutes or until the biscuits are lightly golden. Allow them to cool completely.

To make the custard:
  1. Pour the cream into a saucepan. Split the vanilla pod and scrape out the seeds, adding them to the cream. Bring the cream up to a boil and turn off the heat.

  2. At the same time, fill another saucepan about one-third of the way full with water, and bring it to a simmer over a medium heat. Find a heatproof bowl that fits nicely over the saucepan, making sure the bottom of the bowl doesn’t touch the water. This will be your bain-marie.

  3. In your heatproof bowl (off the heat), whisk together the eggs, yolks and sugar until well combined and smooth.

  4. Gradually pour the hot cream into the eggs and sugar, whisking constantly as you do so.

  5. Place the heatproof bowl over your saucepan of simmering water and continue whisking your custard until it thickens. This should take ten to fifteen minutes. Once the custard coats the back of a spoon, remove it from the heat.

  6. Allow the custard to cool, covered, at room temperature, then transfer to the fridge until you’re ready to assemble the trifle.

Assembling the trifle:
  1. Start by soaking the biscuits in the sweet dessert wine, then use them to create the first trifle layer in the bottom of your chosen dish � no deeper than a quarter of the bowl’s overall depth.

  2. Now for the jelly. Soak the gelatine leaves in cold water for about ten minutes. In the meantime, take the rhubarb juice you made earlier � you should have about 600ml (if not, top it up with the extra orange juice) � and warm half of it to a low simmer. Squeeze out the water from the gelatine and whisk it into the warm liquid, then add the rest of the rhubarb juice.

  3. Lay the poached rhubarb and strawberries (leftover from making the juice) on top of your sponge layer, then gently pour over the jelly mixture. Place the half-assembled trifle in the fridge until the jelly has set (this will take about three to four hours).

  4. Once set, take the trifle out and pour over the custard. Chill in the fridge again for a couple of hours until set further.

  5. When you’re ready to serve, whip the cream, vanilla and icing sugar together until soft peaks form, and either pipe or spoon the mixture over the top of the trifle. Finish by sprinkling with the toasted flaked almonds and freshly diced strawberries.

]]>
/en-fr/blogs/stories/apple-blackberry-and-cinnamon-puff-pastry-tarts 2024-02-05T16:03:55+00:00 2024-02-05T16:03:55+00:00 Apple, blackberry and cinnamon puff pastry tarts Chloe Oakley A slightly different take on the classic apple pie. One that’s ready to be wrapped up and taken with you on an afternoon walk, whether you’re venturing out on a proper ramble or simply dashing to the local park between rain showers.

Put aside tenminutes for prep and 15 minutes for cooking


Makes enough for four

What you’ll need

  • 2 apples (we like Cox’s for this recipe. Granny Smiths also work well as they keep their shape)
  • 320g pre-rolled puff pastry
  • 8 blackberries
  • 1½ tsp apricot jam
  • 10ml cold water
  • Ground cinnamon, for dusting

What to do

  1. Preheat the oven to 180°C (160°Cfan, gas mark 4). Lay out your rolled puff pastry, keeping it on the parchment paper, and cut out four sections � each one 11cm x 8cm.

  2. Peel, quarter and remove the core from your apples and slice each quarter lengthways as thinly as you can to get multiple slices.

  3. Place them, overlapping, on each pastry piece to cover them entirely, except for a 0.5cmborder around the edges.

  4. Do the same thing again so you have two layers of apple slices on each rectangle of pastry.

  5. Now, take a small saucepan and heat the apricot jam withthe water.

  6. Once warm, brush the apples with the jam. Make sure you leave the pastry edges otherwise they’ll burn.

  7. Pop the tarts onto a baking tray and cook for 15 minutes until the apples are tender and the pastry is golden brown.

  8. When they’re out of the oven, dust each one with cinnamon and tumble the fresh blackberries on top.

You could always...

Pack a small pot of clotted cream or crème fraîche � these tarts are delicious on their own, but go really well with something soft and creamy too.

]]>
/en-fr/blogs/stories/smashed-butternut-roasted-garlic-pomegranate-croutes 2023-12-20T09:23:10+00:00 2023-12-20T09:23:10+00:00 Smashed butternut, roasted garlic & pomegranate croutes Chloe Oakley

For those evenings when you just have a few friends popping by, when you need something bite-size to hand round at a get-together, or you’re looking for a recipe to serve as the prelude to the main event, it’s good to have a few smaller dishes up your sleeve. Like these smashed butternut, roasted garlic and pomegranate croutes. The recipe below is enough to make ten to twelve small slices of squash-topped toast.

What you’ll need

  • 1 large butternut squash
  • 5 tbsp olive oil
  • 3 garlic cloves
  • 1 tsp chilli flakes
  • 3 sprigs of fresh thyme
  • Sourdough bread
  • A bunch of fresh flat-leaf parsley, roughly chopped
  • 1 pomegranate (just the seeds)
  • A sprinkling of sea salt, cracked black pepper and grated parmesan

What to do

  1. Preheat the oven to 200°C (180°C fan) or gas mark six.
  2. Cut the butternut squash in half lengthways. Scrape out the seeds and then place each half of the squash (skin-side down) onto a lined baking tray.
  3. In a bowl, pour in the olive oil. Crush two of the garlic cloves by carefully pressing down on them using the side of a wide chopping knife. Pull the skin away and put the flesh into the olive oil bowl. To that, add the chilli flakes and thyme sprigs, and mix.
  4. Pour the mixture over the squash and then sprinkle with a little water from your hand. Cover the squash with a layer of baking parchment, leaving it loose rather than tucking it in tightly.
  5. Roast for 25 minutes, removing the parchment for the last five minutes, and then place the squash to one side to cool, leaving the oven on. While it’s cooling, slice as many pieces of fresh bread as you need, rubbing them with olive oil and the remaining garlic clove, and place them in the oven to warm slightly � five minutes at the same temperature is plenty.
  6. As the bread is warming, scrape out the soft butternut squash flesh and the garlic mixture (removing the thyme sprigs) into a bowl and mash with a fork. Add the parsley once mashed.
  7. Take the bread out of the oven, then generously top with the squash mixture, a scattering of pomegranate seeds, a touch of seasoning and the grated cheese.

This recipe was originally created for our sixth volume of Stories by the Somerset-based chef Sam Wylde, owner of .

]]>
/en-fr/blogs/stories/orange-and-ginger-madeleines 2023-11-28T15:33:01+00:00 2023-12-14T17:22:50+00:00 Orange and ginger madeleines Chloe Oakley

It’s always good to have a little something on hand for when friends or family unexpectedly stop by � which seems to happen all the more in the bonhomie of the festive season. And even better when that little something is homemade. Light, fluffy and delicately flavoured with orange and ginger, these madeleines will hit just the right sweet spot alongside a cup of tea. Makes enough for 12.

What you’ll need

  • A 12-hole madeleine tin
  • 100g unsalted butter, melted and then cooled
  • 2 medium eggs
  • 100g golden caster sugar
  • 80g self-raising flour, sifted
  • 20g ground almonds
  • 2 tsp ground ginger
  • 2 balls of preserved stem ginger in syrup, finely chopped
  • 1 orange, zested plus 1 tbsp of juice
  • A sprinkling of sea salt

What to do

  1. Use a touch of the butter to lightly grease the madeleine tin. If you have some plain flour in the cupboard, sprinkle a small amount over the moulds too to make it as easy as possible to ease the madeleines out of the tin later.

  2. In a mixing bowl, whisk the eggs and sugar together until they’re pale, fluffy and a little frothy.

  3. In a separate bowl, combine all of the remaining ingredients, then fold them into the egg and sugar mixture to create a smooth batter.

  4. Leave the batter to sit for half an hour, and in this time, make sure your oven is preheated to 200°C (180°C fan) or gas mark six.

  5. Spoon just less than a tablespoon of mixture into each madeleine hole. Bear in mind that they’re going to rise, so you’re not looking to fill them to the top.

  6. Bake in the oven for eight–ten minutes until golden brown, and if you can, serve them warm.

This recipe was originally created for our sixth volume of Stories by the Somerset-based chef Sam Wylde, owner of .

]]>
/en-fr/blogs/stories/donal-skehan-s-autumnal-hosting-menu 2023-11-02T16:15:07+00:00 2024-01-02T17:37:37+00:00 Donal Skehan’s hosting menu Chloe Oakley

Orecchiette with Kale and Spicy Pangrattato

Sometimes known as ‘poor man’s parmesan�, and sprinkled on many pasta dishes, pangrattato is Italian for fried breadcrumbs. In this recipe, the pangrattato gives an added kick to a classic rustic pasta dish with the addition of spicy chilli and garlic.

Serves: 4
Time: 25 mins

What you'll need

For the orecchiette with kale

  • 350g orecchiette pasta
  • 40ml olive oil
  • 2 anchovy fillets
  • 2 garlic cloves, finely sliced
  • 1 tsp chilli flakes
  • 250g kale, stalks removed and roughly chopped

For the spicy pangrattato

  • 30ml olive oil
  • 150g sourdough bread, or any crusty bread, a few days old is best
  • 1 red chilli, very finely chopped
  • 1 garlic clove, minced
  • Salt and freshly ground black pepper

What to do

  1. For the pangrattato, blitz the bread in a food processor until fine crumbs are formed.

  2. Add the olive oil, chilli and garlic to a large frying pan and set over a medium heat. Tip in the breadcrumbs and stir to coat then cook, stirring constantly to ensure the breadcrumbs toast evenly, for about 8 - 10 minutes until the breadcrumbs are golden and toasty. Tip onto a baking tray lined with kitchen paper and set aside.

  3. Place a pot of boiling, salted water over a high heat and cook the orecchiette according to the packet instructions.

  4. In a large frying pan add the olive oil, anchovy fillets and garlic and heat, slowly, until the garlic is fragrant and the anchovies have broken down. Add the chilli flakes, kale and cook for about 5 minutes, until the kale has wilted.

  5. Add in the cooked orecchiette along with a ladleful of the pasta cooking water and toss to emulsify everything and coat the pasta.

  6. Serve in pasta bowls sprinkled with the pangrattato.

Baby Gem Chopped Salad with Grated Pecorino, Spiced Bread Crumbs and Simple Caesar Dressing

It’s the crunchy crumbs that take this to a new level and they keep really well so try making double or even triple the recipe and keeping the rest in a sealed container for up to a week to sprinkle on top of your pasta, salads or even sprinkled over your morning bacon and eggs!

Serves: 4
Time: 20 mins

What you'll need

For the salad

  • 4 baby gem, quartered then cut in wedges on the diagonal
  • 40g pecorino, coarsely grated
  • Sea salt & freshly ground black pepper

For the caesar dressing

  • 2 tbsp mayonnaise
  • 3 tbsp greek or natural yoghurt
  • 3 anchovies, finely chopped
  • 1 tsp dijon mustard
  • 1-2 dashes of worcestershire sauce
  • Squeeze of lemon juice
  • 15g parmesan, finely grated

For the spiced breadcrumbs

  • 2 tbsp olive oil
  • 20g unsalted butter
  • 1 clove garlic, grated
  • ¼ tsp hot smoked paprika
  • Finely grated zest of a lemon
  • 60g fresh white breadcrumbs
  • 2 tbsp chopped flat leaf parsley

What to do

  1. Put the baby gem and pecorino into a large serving bowl.

  2. Blend all the ingredients for the dressing together, season to taste and set aside.

  3. For the spiced breadcrumbs, heat the oil and butter in a large frying pan over a medium heat. Add the garlic, paprika, lemon zest and breadcrumbs, toss to combine and fry until golden and crispy. Tip into a bowl and toss with the parsley.

  4. Drizzle the dressing over the salad leaves and sprinkle with the breadcrumbs and serve.

Self Saucing Blackberry & Lemon Pudding

The tartness of the blackberries (which can be fresh or frozen) and zing of the lemons in this warming pudding are offset by the sweet, fluffy sponge mix. The perfect comforting finale to a family Sunday lunch.

Serves: 4-6

Time: 50 minutes

What you'll need

  • 50g unsalted butter, softened
  • 180g caster sugar
  • 3 medium free range eggs, separated
  • Lemon, finely grated zest and juice
  • 50ml apple juice
  • 50g plain flour
  • 250ml whole milk
  • 200g fresh blackberries
  • Icing sugar, to dust

What to do

  1. Heat the oven to 180°C/160°C fan/350°F/Gas Mark 4.
  2. In a large bowl, whisk the butter with the caster sugar - it will sort of look like breadcrumbs - then gradually beat in the egg yolks one at a time.
  3. Add the lemon juice to a measuring jug, and pour in enough of the apple juice to bring the total quantity of liquid to 100ml. Pour this into the large bowl and beat in with the lemon zest, flour and milk.
  4. In another bowl, whisk the egg whites until they form soft peaks but are not stiff and fold these into the batter.
  5. Scatter the blackberries into a 1 litre ovenproof dish and stand it in a deep roasting tin. Pour the batter over the top of the blackberries then pour just boiled water around the sides of the dish into the roasting tin so it comes halfway up the side. Transfer to the oven and bake for 30-35 minutes until the sponge is set. Allow it to stand for a few minutes then dust with icing sugar and serve.

]]>
/en-fr/blogs/stories/deliciously-ella-s-autumn-menu 2023-09-21T14:50:52+01:00 2023-09-21T14:50:52+01:00 Deliciously Ella’s Autumn Menu Chloe Oakley Created and fine-tuned in her Henley studio kitchen, Ella Mill’s plant-based menu includes a slow roasted aubergine dish, a jewelled wild rice salad, and a plum, blackberry & maple crumble. All of which are packed full of flavour, easy to make and bring a little warmth as the weather starts to cool.

Slow roasted aubergine & butternut squash

This is the perfect plant-based main. Slow roasted wedges of aubergine and butternut squash are tossed with chilli, thyme, and za’atar, then layered with crispy maple lentils and spicy garlic yoghurt. Makes enough for four

What you'll need

For the slow roasted aubergine

  • 3 aubergines, cut lengthways into 2cm wedges
  • 1 small butternut squash, seeds removed and cut lengthways into 2cm wedges
  • 3 tbsp olive oil
  • 1 tsp chilli flakes (optional)
  • A small handful of thyme, leaves picked
  • 1 tbsp za’atar
  • 20g mixed soft herbs, roughly chopped(I love a mixture of coriander, chives, and dill)

For the crisply lentils

  • 400g green or brown lentils, drained
  • ½ tbsp olive oil
  • 4 heaped tbsp pumpkin seeds (about 60g)
  • 1½ tbsp maple syrup
  • 1½ tbsp tamari
  • A pinch of chilli flakes (optional)

For the roasted garlic yoghurt with harissa

  • 300g coconut yoghurt
  • 1 bulb garlic
  • 1 tbsp harissa

What to do

  1. Preheat the oven to 180°C. Add the aubergine, squash, olive oil, and chilli flakes (if using) to a large baking tray. Season well with salt and pepper, then use your hands to mix everything together and spread the veg out into a single layer. You mayneed to use two trays to do this.
  2. Slice the very top off the garlic bulb, so that you can just see the inside of the cloves, and drizzle with a little olive oil. Wrap loosely in foil and add to the corner of the baking tray. Cook the vegetables for 1 hour, stirring halfway, until silky soft and tender.
  3. Meanwhile, add the lentils, olive oil, maple, tamari, and chilli flakes (if using) to a small baking tray. Toss together and oven cook for 10 minutes. Remove the tray, then stir through the pumpkin seeds and return to the oven for 10 minutes. Set aside to cool until everything is ready.
  4. Once cooked, remove the tray of vegetables fromthe oven and take out the garlic bulb. Scatter the za’atar and thyme leaves over the vegetables and return to the oven for 10 minutes, or until everything is golden and fragrant. Set aside tocool slightly before serving.
  5. To make the roasted garlic yoghurt, squeeze the garlic cloves into a small bowl and roughly mash with the back of a fork. Stir through the yoghurt and season to taste with salt and pepper.
  6. To serve, spoon the garlic yoghurt onto a large, flat serving dish and drizzle over the harissa. Spoon over half of the crispy lentils, followed by the roasted vegetables. Scatter over the remaining lentils, then add the herbs and a generous pinch of sea salt flakes.

Jewelled wild rice salad

This jewelled wild rice salad is packed with delicious flavours, including spring onions,pomegranates, maple, and cinnamon. It’s very easy to make, making it a versatileside dish you’ll return to again and again. Makes enough for four.

What you'll need

For the salad

  • 200g wild rice
  • A drizzle of olive oil
  • 5 spring onions, thinly sliced
  • 100g pomegranate seeds
  • 30g parsley, roughly chopped
  • 3 carrots, julienned or grated

For the dressing

  • 3 tbsp olive oil
  • 1½ tbsp sherry vinegar
  • 2 tbsp maple syrup
  • ½ tsp cinnamon
  • ½ tsp allspice
  • Salt and pepper

What to do

  1. Add the rice to a saucepan of salted water and cover with a lid. Bring to the boil, then reduce the heat and simmer for 30-35 minutes, until just cooked. Drain and refresh in cold water, before thoroughly draining once more. Transfer to the salad bowl and stir through a little olive oil.
  2. While the rice is cooking, make the dressing. Simply whisk together the olive oil, vinegar,maple, cinnamon, allspice, a pinch of salt, and plenty of black pepper.
  3. Once you’re ready to serve, add the spring onions, pomegranate seeds, parsley, and carrots to the salad bowl and toss to combine. Stir through the dressing, then taste to check the seasoning and adjust as needed.

Plum, blackberry & maple crumble

Nothing beats a hot fruity crumble ona cold day. With hints of cinnamon, vanilla, maple, and almond, this beautiful plum and blackberry crumble looks and tastesabsolutely amazing.Makes enough for four.

What you'll need

For the fruity filling

  • 6 plums, halved and cut into 1cm slices
  • 300g blackberries
  • ½ tsp vanilla bean paste
  • 2 bay leaves
  • ½ tsp ground cinnamon
  • ½ tsp ground cinnamon
  • 1-2 tbsp coconut sugar, to taste
  • A pinch of salt

For the crumble

  • 150g spelt flour,sifted
  • 150g porridge oats
  • 3 tbsp flaked almonds
  • 4 tbsp maple syrup
  • 4 tbsp olive oil
  • A pinch of sea salt flakes

What to do

  1. Preheat the oven to 180°C/160°C fan.
  2. Toss together the plums, blackberries, vanilla, bay leaves, cinnamon, sugar, and a small pinch of salt (to balance the sweetness of the fruit). Tip into an ovenproof dish (roughly 25x30cm).
  3. To make the crumble, sift the flour into a bowl then toss together with the oats, almonds, and sea salt flakes. Pour in the maple syrup and olive oil and use your fingers to bring everything together until the mixture resembles wet breadcrumbs. A few larger lumps are great as these will create a lovely crunchy texture once cooked.
  4. Scatter the crumble over the fruit and cook for 30-35 minutes, until golden and bubbling. Serve with coconut yoghurt or vegan ice cream.
]]>
/en-fr/blogs/stories/four-recipes-for-a-light-summer-s-supper 2023-08-15T09:50:01+01:00 2023-08-15T09:50:01+01:00 Four recipes for a light summer’s supper Chloe Oakley In the easy-to-follow recipes below� created by Sam Wylde, our go-to local chef ofin Frome � you’ll find four dishes that work beautifully together for lunch or a light supper.

More

]]>
It’s not all about picnics and barbecues (though, when the sun is out, that’s largely how you’ll find us). During the warmer summer months, our fridge is filled with as many ingredients that’ll give us light and fresh recipes � sometimes zingy, sometimes creamy, other times fragrant and lightly spiced.

In the easy-to-follow recipes below� created by Sam Wylde, our go-to local chef ofin Frome � you’ll find four dishes that work beautifully together for lunch or a light supper. Try serving the toasts as an appetiser, or for a smaller plate, you could serve them with one of the other dishes, like the green beans. Mix and match, pass them around, and tuck in. They all serve up to six people.

Baked side of salmon with lemon, fennel & spring herb crème fraîche

Put aside: five minutes for prep and 25 minutes for cooking.

What you’ll need

For the salmon
  • 1 side of salmon (or fillets)skin on
  • 50ml apple juice (or water if you’d rather a little less sweetness)pure and pressed, not from concentrate
  • 3 lemonssliced
  • 3 glugs of olive oil
  • 2 fennel bulbssliced
  • 1tsp sea salt flakes and cracked black pepper
For thecrème fraîche
  • 1 small bunch each of fresh dill, basil and flat leaf parsleyfinely chopped
  • 1 lemonzested
  • A pinch of sea salt flakes and cracked black pepper

What to do

  1. Preheat your ovento 200°C (180°C fan) or gas mark six.
  2. Line a baking tray (one that has sides that are at least an inch high) with non-stick baking parchment.
  3. Roughlymake a bed using half of the fennel and lemon slices on the tray.Drizzle a little olive oil over the top and then place your salmon onto the bed. Cover it withthe rest of the lemon and fennel before adding a little more olive oil and a scattering of salt and pepper.
  4. Now pour in the apple juice or water (remember, for a little extra sweetness go for apple juice, but if you just want a soft texture and no added flavour, stick with water). Carefully place the baking tray in the oven and bake the salmon for 18�22 minutes. You want the thickest part of the salmon to be just about cooked because it’ll continue to cook while it’s resting.
  5. Now onto the crème fraîche. Simply takeall of your finely chopped herbs and lemon zest, combine them with the crème fraîche and stir. Add a little salt and pepper to taste, and you’re done.
  6. Transfer the salmon to your serving plate and dress it with the roasted lemons and fennel, with thecrème fraîche in a little pot to the side.

Green beans with lemon and toasted pine nuts

Put aside: five minutes for prep and no more than three minutes for cooking.

What you’ll need

  • 600g fine green beansfresh, not frozen
  • 50g parmesan (or a vegan substitute like the Prosociano wedge by Violife)finely grated
  • 50g pine nutslightly toasted
  • 1 lemonzested and juiced
  • A glug of olive oil
  • A pinch of cracked black pepper

What to do

  1. Take a medium-sized pan and fill it with cold water and a generous pinch of salt. Put it on a high heat to bring it to the boil.
  2. While the water comes to boiling point, trim your green beans by removing the woody ends.
  3. When the water is ready, blanch the green beans for three minutes. Make sure you’re strict here as you want them to crunch. As soon as the three minutes are up, drain them straight away and run them under cold water or they’ll continue to cook. This helps them to keep their lovely colour too.
  4. To toast the pine nuts, put a frying pan on a low-medium heat and keep them moving for a few minutes until they begin to catch.
  5. Toss the cooled beans in olive oil (in the same pan that you cooked them to save washing up!) and add in the cheese, lemon zest, juice, pine nuts and seasoning. And they’re ready to serve.

Smashed pea & mozzarella toasts

Put aside: ten minutes for prep andless than ten minutes for cooking.

What you’ll need

  • 1 loaf of fresh ciabattagriddled or toasted
  • 500gshelled peasfresh, not frozen
  • 150gmascarpone
  • 50g parmesan (or a vegan substitute)finely grated
  • 25mlolive oil
  • 3 balls of buffalo mozzarella (or a vegan substitute)
  • 1tsp lemon juice
  • A pinch of cracked black pepper

What to do

  1. Again, start by getting a medium-sized pan, fill it with water, add a little salt and bring to the boil.
  2. Cook the shelled peas for four minutes, at which point they should be nice and tender.
  3. Drain them and add them to a food processer or blender along with the oil, mascarpone, lemon juice and seasoning. Pulse until you get a rough paste.
  4. Heat a griddle pan and toast both sides of the ciabatta so they’re scored. Otherwise, toast them under the grill and then drizzle each slice with a little oil.
  5. Spread the blitzed pea mixture onto each piece of bread and then top with torn mozzarella and a sprinkling of parmesan, seasoning and few drops of oil for colour.

New potato, garden pea and pesto salad

Put aside: 15 minutes for prep and 15-20 minutes for cooking

What you’ll need

  • 1kg new potatoes
  • 250g petit poisfresh or frozen
  • 50g parmesan (or a vegan substitute)finely grated
  • 25g pine nuts
  • 2 bunches of fresh basilfinely chopped
  • 1/2 garlic cloveminced
  • 1/2 lemonjuiced
  • A pinch of sea salt flakes
  • A glug of olive oil

What to do

  1. Tip the potatoes into a panand fill it with cold water so they’re all covered. Add a good pinch of salt and cook until just tender. Depending on the size of your potatoes, that should take no more than 20 minutes.
  2. While the potatoes are cooking, mix all of the other ingredients� aside from the peas� together in a food processor or blender to make the pesto. Don’t blitz for too long or you’ll lose the texture. Add a touch extra oil if the mixture seems too thick.
  3. When the potatoes are cooked through, drain them in a colander and add the peas. If you’re using frozen ones, there’s no need to cook them as the heat of the potatoes will do that for you. You can cut the potatoes in half, keep them whole or have a mixture.
  4. Add the pesto, peas and potatoes back into the pan and gently mix them so you don’t break up the potatoes. Taste, and add extra seasoning if needed, then tip the salad into a serving dish.
]]>
/en-fr/blogs/stories/a-make-ahead-berry-pavlova 2023-08-09T12:28:31+01:00 2025-07-02T11:18:21+01:00 A make-ahead berry pavlova Chloe Oakley When you’re playing host for a special occasion, it’s always a good idea to have a few recipes under your belt that you can make in advance so you’re not spending all your time in the kitchen the next day. This berry pavlova is just such a dish, and is one of our go-tos for spring and summer gatherings.

More

]]>

When you’re playing host for a special occasion, it’s always a good idea to have a few recipes under your belt that you can make in advance so you’re not spending all your time in the kitchen the next day. This berry pavlova is just such a dish, and is one of our go-tos for spring and summer gatherings. If you’re making it the night before, follow steps one–four, then continue with step five just before you serve. You can also use whatever berries are in season or, if you’re making it in early spring, thawed frozen ones from last summer.

Makes enough for six (with extra for seconds)
Put aside: about 50 minutes for prep and an hour for cooking

What you'll need

  • 6 large free-range egg whites
  • 300g caster sugar
  • A pinch of sea salt
  • 400g berriesfresh or thawed
  • 200ml double cream
  • 200ml natural yogurt(fat-free works fine)
  • 2 tbsp caster sugar
  • 1 vanilla podseeds removed
  • 1-2 drops of pink food colouring
  • A scattering of fresh mint leaves

What to do

  1. Preheat your oven to 150⁰C/gas mark two. Crack the egg whites into a clean bowl and get whisking. You’re looking for firm peaks.
  2. Keep whisking while adding the caster sugar and a sprinkling of salt, bit by bit. Then, turn your mixer up to the highest setting (if you don’t have a mixer, you’ll need to whisk with all your might) for seven minutes or so until you have a meringue mixture. It should be bright white and glossy.
  3. Scoop out a quarter of the mixture into a separate bowl and very carefully add a drop of pink food colouring. Use a knife to lightly swirl the colour through the meringue, creating a marbled effect rather than changing the colour completely.
  4. Line two baking sheets with parchment. Draw out a circle that’s 20cm in diameter to act as your guide and then several smaller circles between 5�10cm on the other. On the larger circle, spread the plain white meringue mixture evenly then add more around the edges so you have a well in the middle. For the mini meringues, use a piping bag with a medium-size star nozzle to pipe three-four little, pink-marbled meringues to use for decoration. (If you don’t have a piping bag, you could also simply spoon them in place.) Bake for an hour until the meringues are ever-so-slightly golden, taking the smaller ones out as soon as they look ready.
  5. Now the fun part. Any combination of berries works here, and you can stick to one sort or have a mixture. The cream flavouring is entirely up to you too. We chose classic raspberries with vanilla and mint but the delicate notes of orange blossom or rosewater wouldwork well too.
  6. Whip the cream with the sugar until you get soft peaks. Then stir in the yoghurt slowly along with the vanilla seeds. Spoon your creamy mixture into the well you created in the larger meringue and dot with raspberries. Perch the mini meringues on top at different angles before adding the final few raspberries and dusting with icing sugar.
  7. Rest on a cake stand and bring it to the table as it is, or scatter a few mint leaves on top.
]]>
/en-fr/blogs/stories/french-toast-with-baked-peaches-and-coconut-cream 2023-06-12T16:00:52+01:00 2023-06-12T16:00:52+01:00 French toast with baked peaches and coconut cream Chloe Oakley

July’s arrival heralds the start of peach season. And while there’s nothing quite like a perfectly ripe, fresh peach straight from the fruit bowl (or, if you’re very lucky, the tree), a little heat, a touch of sweetness, and a smidgeon of spice can transform a handful of peaches into a simple but special pudding � or, in this case, breakfast. Just the thing for slow summer weekend mornings, this recipe can also be found on the menu at our Bath café,.Makes enough for four people.

What you'll need

For the peaches

  • 8 flat peaches, or 4 large ones
  • 150g sugar
  • 2 tsp vanilla extract
  • For the French toast:
  • 4 eggs
  • 50g brown sugar
  • 300ml oat milk
  • 2 tsp ground cinnamon
  • 2 tsp ground cardamon
  • 2 tsp ground nutmeg
  • 4 large slices of your chosen bread (we’ve used sourdough)
  • 50g vegetable oil or butter, for frying
  • For the coconut cream:
  • 1 x 450ml tin of coconut milk, chilled
  • 4 tsp icing sugar

To serve

  • Maple syrup
  • Fresh thyme leaves

    What to do

    1. Preheat your oven to 200°C. Halve the peaches and carefully remove the stones. Place the peaches in a baking dish and sprinkle with the sugar and vanilla. Bake for ten–fifteen minutes or until soft and beginning to caramelise.
    2. For the French toast, mix together the eggs, sugar, oat milk and spices in a small bowl. Lay the slices of bread out in a tray and pour over the egg mixture, making sure each slice is well coated on both sides. Leave to soak for about ten minutes.
    3. Add the oil or butter to a large frying pan, and fry the soaked bread slices on a medium heat for three–four minutes on each side until golden.
    4. Now for the coconut cream. Separate the watery liquid in the tin of coconut milk from the creamy solids (you might want to keep the water � it’s a delicious addition to soups and smoothies). Chilling the coconut milk in the fridge helps with this.
    5. Add the solids to a small bowl with the icing sugar and, using an electric whisk, whip until fluffy.
    6. To assemble, top each piece of French toast with a couple of roasted peach halves, a dollop of whipped coconut cream, and a generous drizzle of maple syrup. Scatter with fragrant thyme leaves and serve.

    If you’re ever in Bath, we’d love to see you at for brunch, lunch or afternoon tea. But if you’re further afield, we also regularly share our café recipes over on .

      ]]>
      /en-fr/blogs/stories/spring-feasting-recipes-a-trio-of-salads 2023-05-09T11:58:16+01:00 2023-05-23T17:01:13+01:00 Spring feasting recipes: a trio of salads Chloe Oakley

      More

      ]]>
      Spring marks the start of salad season proper (although we are partial to a warm salad in autumn and winter). Whether raw or gently cooked, spring and summer vegetables shine their best in a lightly dressed salad, and brighter days put us in the mood for something fresher yet fragrantly spiced. Which is why, together with our Bath café, , we’re getting the season off on the right foot with this trio. You could make each alone, but we think they’re especially brilliant served together for a real sense of a feast. Each is plant-based, but if you’re not, you can partner them with our whole side of salmon.

      Roasted and pickled carrot salad with spring onions

      Makes enough for: six, as a side

      What you’ll need:

      • 1kg carrots, washed and peeled
      • 2 tsp fennel seeds
      • 1 tbsp white wine vinegar
      • 1 tbsp soft brown sugar
      • 2 tsp paprika
      • 100g spring onions
      • A drizzle of olive oil

      What to do:

      1. Preheat your oven to 180°C fan (that’s about 200°C if you have a convection oven, or gas mark four).
      2. Take around two thirds of the carrots and cut them on an angle into slices about two centimeters thick.
      3. Toss these on a large baking tray with two tablespoons of olive oil (thereabouts), the paprika and a sprinkling of salt and pepper. Roast in the oven for about 30 minutes.
      4. Meanwhile, using a vegetable peeler, create ribbons from the rest of the carrots then place these into a mixing bowl with the fennel seeds, vinegar and sugar. Give everything a good stir and leave to sit while the other carrots are roasting.
      5. Slice the spring onions � on an angle again � and set aside.
      6. Once the roasting carrots have softened and are beginning to colour and caramelise, take them out of the oven.
      7. To assemble your salad, simply layer up the roasted and pickled carrots (try and avoid adding too much of the pickling liquid) together with the spring onions.

      Giant wholewheat couscous, tenderstem broccoli, asparagus & radish salad with wild garlic dressing

      Makes enough for: six, as a side

      What you’ll need:

      • 150g giant wholewheat couscous
      • 150g asparagus
      • 150g tenderstem broccoli
      • 100g radishes
      • A large bunch of wild garlic (or spinach and a clove of garlic)
      • 20g basil
      • Extra virgin olive oil
      • 1 unwaxed lemon
      • Sea salt and cracked black pepper

      What to do:

      1. Cook the couscous according to the packet instructions (normally this is about ten minutes) until it’s al dente. Once that’s done, rinse it and drain off any excess water.

      2. While the couscous is cooking, trim the broccoli and asparagus and cook these in boiling water for about two minutes, before quickly removing and plunging into ice cold water to stop the cooking. You want them to keep their greenness and bite.

      3. Slice the radish as finely as possible and set aside.

      4. For the dressing, place the wild garlic (or spinach) in a bowl and pour boiling water over so the leaves wilt. Remove from the water and rinse under cold water before draining. Place in a food processor with the basil leaves, the zest of the lemon and about two tablespoons of olive oil (add the garlic clove at this stage too if you’re using spinach). Blitz to a smooth paste and season with salt and pepper.

      5. Add all the vegetables to a large serving bowl and toss together with a couple of tablespoons of the dressing. Check the seasoning and serve.

      Green salad with turmeric roasted cauliflower and a lemon & honey vinaigrette

      Makes enough for: six, as a side

      What you’ll need:

      • 200g mixed baby salad leaves
      • 1 small head of cauliflower
      • 1 tsp turmeric
      • Olive oil
      • 1 tsp honey
      • Sea salt and cracked black pepper
      • 1 unwaxed lemon

      What to do:

      1. Preheat the oven to 200°C/180°C fan/gas mark four.

      2. Cut the cauliflower up into small florets, including any of the outer leaves that aren’t too tough.

      3. Toss together on a baking tray with the turmeric, a tablespoon of olive oil and a generous pinch of salt and pepper.

      4. Roast in the oven for about 20 minutes or until the cauliflower florets and leaves begin to colour.

      5. In a small bowl, zest the lemon and add in its juice, two tablespoons of olive oil and a teaspoon of honey. Season with salt and pepper and set aside.

      6. Place the baby leaves in a salad bowl, top with the cauliflower and dress with the lemon vinaigrette. Give everything a good stir and serve.

      Should you be planning a day trip to the beautiful city of Bath, do stop by for a bite to eat. You’ll find the café right next door to Neptune Bath.

        ]]>
        /en-fr/blogs/stories/lemon-posset-with-honey-oat-crunch 2023-03-31T14:26:53+01:00 2023-03-31T18:32:34+01:00 Lemon posset with honey oat crunch Sophie Gaitskell A delightfullyzesty lemonposset, each dusted with a handful of warm oat crunch.

        More

        ]]>

        What you'll need:

        • 350g silken tofu drained
        • 3 tbsp maple syrup
        • 2 tbsp coconut oil melted
        • 1 large unwaxed lemon zested and juiced
        • 50g almonds
        • 25g oats
        • 1 tbsp honeycomb or runny honey

        What to do:

        1. In a blender, whizz together the tofu, maple syrup, coconut oil, lemon zest and juice until smooth, then pour the mixture into four ramekins or small glasses.
        2. Pop these in the fridge and leave them to set overnight.
        3. The next day, shortly before you serve, warm your oven to a medium heat. Blitz up the almonds in a food processor or roughly chop them with a knife before tipping them onto a lined baking tray together with the oats.
        4. Crumble over the honeycomb or, if you can’t get hold of honeycomb, drizzle over the runny honey.
        5. Give everything a good stir and bake in the oven for about ten minutes, stirring halfway through. Be sure to keep an eye on things as the honey can catch and burn very quickly.
        6. To serve, remove the possets from the fridge and top each with a handful of the still warm oat crunch.
        ]]>
        /en-fr/blogs/stories/candied-beetroot-apple-smoked-trout-salad 2023-03-15T17:30:00+00:00 2023-05-23T15:09:23+01:00 Candied beetroot, apple & smoked trout salad with sherry vinegar & honey dressing Sophie Gaitskell Try our easy to follow candied beetroot, apple & smoked trout salad with sherry vinegar & honey dressing.Fresh anddelicious, using only the best ingredients.

        More

        ]]>

        What you’ll need:

        • 3 large candy-striped beetroot
        • 1 Braeburn apple
        • 2 fillets of smoked freshwater rainbow trout
        • A small handful of watercress
        • 2 tbsp sherry vinegar
        • 1 tsp honey
        • ½ tsp Dijon mustard
        • 3 tbsp good quality extra virgin olive oil
        • A small handful of chives
        • Sea salt and cracked black pepper

        You could always:

        Swap the rainbow trout for goats� cheese or oven-roasted tofu if you’re following a vegetarian or plant-based diet.

        What to do:

        1. Start by washing and peeling the beetroot. Then, using either a mandolin (watch those fingers!) or a sharp knife, cut each beetroot into thin matchstick-like pieces.
        2. Next, wash and core your apple but leave its peel on and, just like the beetroot, cut it into matchsticks. Place both apple and beetroot into a large mixing bowl.
        3. In a separate small bowl, whisk together the vinegar, honey, mustard and oil with a pinch of salt and pepper.
        4. Pour the dressing over the beetroot and apple and give everything a good toss to make sure it’s all evenly coated before adding in the watercress.
        5. Place your dressed salad onto a serving platter and then flake the trout on top. Finish with a sprinkling of the finely chopped chives and a touch more cracked black pepper.
        ]]>
        /en-fr/blogs/stories/charred-fennal-samphire-beans-with-salsa-verde 2023-02-15T17:30:00+00:00 2023-03-31T18:40:08+01:00 Charred fennel, samphire & beans with salsa verde Sophie Gaitskell This divine warm butter bean and samphire salad is perfect when cooking for a crowd. The charred fennel adds a sweet and caramelised flavour.

        More

        ]]>

        What you’ll need:

        • 2 fennel bulbs

        • 2 jars of good quality butter beans

        • 100g podded broad beans

        • 100g samphire

        • For the salsa verde:

        • 100g mixed herbs (parsley, chive, coriander,

        • basil and mint all work well together)

        • 1 garlic clove grated

        • The zest of 1 lemon

        • 1 tbsp of capers rinsed

        • 100ml extra virgin olive oil

        • Sea salt and cracked black pepper

        Butter beans might not grow in Britain, but they’re still a really great source of fibre, protein and vitamins, and like all legumes, are wonderful for the soil too. Choose the best you can find � we love the Queen Butter Beans from Bold Bean Co. They’re a heritage variety that’s full of flavour and are jarred, rather than tinned, which involves slower cooking to preserve those nutrients.’�

        What to do:

        1. Begin with the salsa verde by adding all the ingredients to a blender and whizzing them up until they’re smooth.
        2. Taking the fennel bulbs and keeping their woody cores intact to help hold each piece together, slice them into quarters before coating in olive oil.
        3. Heat up a barbecue or griddle pan to a medium-high heat and place the fennel on the grill, cooking for about three–four minutes on each side until slightly charred and softened.
        4. Blanch the samphire and podded broad beans in boiling water for about two minutes, before draining and rinsing in cold water.
        5. Peel the broad beans of their tough outer skins and throw these away.
        6. Drain and rinse your butter beans. You can either gently warm them at this stage or serve them cold � either is fine because, from a jar or tin, they’re already cooked.
        7. Combine the butter beans, broad beans, samphire and a couple of tablespoons of the salsa verde together, then check the seasoning.
        8. To serve, simply pile the bean mixture onto a serving platter and top with the charred fennel. I like to slice a lemon in half and chargrill it flesh side down on the barbecue or griddle plan, and then add this at the end.
        ]]>
        /en-fr/blogs/stories/asparagus-and-goats-cheese-tart-with-wild-garlic 2023-02-01T17:30:00+00:00 2023-03-31T18:24:47+01:00 Asparagus and goats� cheese tart with wild garlic Sophie Gaitskell This tart celebrates the British asparagus and wild garlic seasons, and is perfect for both picnics and garden lunches as it can be eaten hot or cold.

        More

        ]]>

        At our Bath café, the menu is always changing with the seasons. From our brunch menu, which has just had its spring refresh, to the tarts, soups and salads on our lunch menu that vary week by week and day by day depending on what ingredients are at their best from our partner farms that morning. This tart celebrates the British asparagus and wild garlic seasons, and is perfect for both picnics and garden lunches as it can be eaten hot or cold. We’ve found it’s plenty to feed six-eight with a salad on the side.

        What you’ll need:

        • A ready rolled sheet of puff pastry

        • 8 free range eggs

        • 75ml whole milk

        • A handful of wild garlic (or 100g spinach and a clove of garlic)

        • 250g asparagus

        • 150g soft goats� cheese

        • A small handful of basil, finely chopped

        • Salt and pepper

        • Olive oil

        • Baking beans

        • Greaseproof paper

        • A 30cm tart case with loose base

        What to do:

        1. Preheat your oven to 180°C. Place a layer of greaseproof paper over your tin and put the ready rolled sheet of pastry on top, gently pressing the pastry into the corners of the tin. Allow the pastry to go over the top of the case so you have a lip about an inch wide the whole way round.
        2. Lay another piece of greaseproof paper on top of the pastry and fill the case up with baking beans.
        3. Carefully put the tart case in the oven and bake for 10�15 minutes, until the case is beginning to colour.
        4. Take the tart case out of the oven, remove the baking beans and top piece of greaseproof paper, before returning the tart case to the oven and cooking for a further five minutes, just to make sure the base is cooked.
        5. While the case is cooking, make the filling. Snap off the woody stalks of the asparagus and discard. Chop the rest into two-inch pieces and fry in a little oil on a medium heat for about five minutes.
        6. Rinse the wild garlic well then roughly chop.
        7. Once the case is cooked, start layering up your filling with the asparagus, wild garlic, goats� cheese and basil.
        8. Crack your eggs into a measuring jug then and add in your milk. Season with salt and pepper and give it all a good whisk. Pour this over the tart filling.
        9. Place your tart in the centre of your oven for about 40�45 minutes. You’ll know it’s done because it should be golden brown and firm to touch. Allow it to cool slightly before slicing up and serving.
        10. This is delicious warm or cold, whether you eat it straight from the oven, or take it on a picnic.

        Just a note to say

        Take care when foraging for wild garlic: make sure it isn’t near a road or directly next to a path. If you can’t find wild garlic, you can easily swap it out for spinach and a clove of garlic � just sauté these after you’ve cooked the asparagus before you add them to the tart.

        Planning a trip to Bath?Be sure to pop by for delicious and nutritious dishes to take away or to enjoy on our terrace.

          ]]>